CARDS FOR SALE

Most cards you see on this site are available for purchase. Simply click the Pay Now button at the bottom of the post of an available card to purchase the card. You will be linked to PayPal for payment. It will come up as "greensnaggletooth@cox.net" which is the name of my internet company. Price is $5.00 unless otherwise stated and includes shipping. Your card will come with an envelope also. Email me with any questions or requests at: sharynsstampbiz@gmail.com
Thanks for taking a look at my creations!!

Wednesday, November 30, 2011

Reindeer Face

Hi everyone!  Well we have made it to the middle of the week.  I am busily doing laundry and do not have a lot of time today to be creative.  I decided to turn to a card I made last year and happened to come across a couple of days ago.  It is one of my cards that I would consider versatile because you can use the face on the card as either the card or on a treat box.  It makes it one of the nicer ones since I always have options. 

Anyway, let me show you the card and we will go from there.


Isn't he cute!!  He is made using a combination of punches and big shot dies.  The ears were made using the wide oval punch.  It is trimmed to the shape I like.  You could also use the large petal from the blossom builder punch.  The white part of the eyes, the eyelids, and the nose are the 1" punch.  The black of the eyes was made with the 1/2" punch.  I chose to do the nose in Real Red, like the base card, because I love the movie Rudolph the Red Nosed Reindeer.  I can remember watching it since I was little.  Of course to make this guy's nose shine, I added red glitter to it.  The actually head of the reindeer is the wonderful top not die for the big shot.  Now I will tell you I used the retired card stock called Close to Cocoa.  You can use the Soft Suede currently available from SU! to make this.  The head, ears, and eyelids are all edged with the matching ink.  For the antlers, I used a die called tulipe.  This die is exclusive to Stampin' Up!.  I used Chocolate Chip card stock for these.  When you run this die through, it will cut out several pieces.  The piece I used for the antlers is one of them.  It works well if you ask me.  Last but not least, I used a fine tip black marker to draw on his mouth.  Add a nice greeting inside and off the card goes.  

I know this post is short but I have so much laundry and cleaning to do today.  It is a little overwhelming.  So I am off to get everything done so I can play with my stamps later.  Thanks for stopping by today.  See you tomorrow!!

Tuesday, November 29, 2011

Punch Tree

"Oh the weather outside is...", well it's beautiful  It has been warm and sunny here is Phoenix.  There are changes coming so they say.  I will believe it when I see it.  Of course I always look forward to the nice days we have, but trust me the rain is really welcomed and so are the lower temperatures. 

Today, I thought I would share with you a cute little tree I made using one punch.  The good thing about this tree is that it is so easy to make.  The bad thing is that the punch used it the photo corner punch which is retired.  Let's get on with the card.


Now I will admit the one thing missing from this card is a greeting.  I totally forgot to put one on before photographing it.  As you can see, I started with a base card of Real Red.  I took a stamp, which I will admit I cannot remember if it is from Stampin' Up! or not, and stamped it using VersaMark ink to make a watermark on the front of the card.  To make the watermark, all you do is stamp the image and let it dry.  No special powders or heat is needed.  It is a quick way to add a design to your card.  I then added a layer of Garden Green which was run through big shot using the petals-a-plenty impression folder.  I punched the corners using the ticket corner punch. 


If you have one of the photo corner punches or remember it, you would get 2 different sized of corners.  To make this tree, you use 3 of the large corners and 1 small one for the top.  I edged the corners with dazzling diamond glitter.  The tree pieces are punched in Garden Green.  To make the trunk, I took a scrap piece of Chocolate Chip card stock and cut it into a rectangle.  I adhered it to the Whisper White piece and then laid out the other pieces.  I attached then one by one once I was happy with the look.  I punched the corners of the piece with the ticket corner punch, edged it with Garden Green ink, and then adhered it to the green piece.  I also added some dazzling diamond glitter to the bottom of the tree to simulate snow as well as snow dots falling from the sky.  
Well I am off to spend the day with my hubby.  He is working a lot lately so this is a time we actually have together.  I will be back on Wednesday with another share.  Please stop by to see what I come up with.  Thanks for dropping by today!

Monday, November 28, 2011

It's Dasher Again!!

I hope all of you survived your Thanksgiving weekend.  Are you tired of left overs yet?  My dad actually told me he bought a smaller turkey to cook this year because he did not want the left overs.  Here at my house, I always make more than needed to be sure we have them.  I can honestly say I am not tired of them yet.  They are almost gone so I think I might actually miss them.  I spend part of the day Friday working on cards and part of it pulling out Christmas stuff.  I love doing that.  Saturday was lots of fun.  Both my girls and their boyfriends came over to have a cook out and build gingerbread houses.  It is always so much fun and a little competitive.  Sunday was a day of watching the Red Zone.  It was so nice just to be with my husband.  

Today I thought I would share a card made with one of my prettiest Christmas stamps.  I used Dasher again for this one.  The stamp itself is so pretty on its own that it really needs no other embellishments.  Let me show you how I did him this time.


I started by stamping him using VersaMark ink on Hunter Green card stock.  I then heat embossed him with white powder.  The green is layered on Basic Black and then on Bravo Burgundy.  The uniqueness of this card is that it is not made using card stock.  Can you guess what I used from the picture?


The actual card is made from acetate.  You can pick this up at local craft stores or at your local office supply store.  If you go the the office supply store, these are not called acetate.  They are overhead projector transparencies.  To start this card, I cut the acetate at 4 1/4" x 11".  Score it at 5 1/2" using your bone folder.  I then got out my StazOn ink in white.  You can get this through Stampin' Up!.   The main reason you need to use the StazOn is because it is fast drying ink.  You do not want to smear your snowflakes.  The snowflake stamp used comes from the retired set Sparkly and Bright.  I repeated the layers of the front colors on the inside of the card.  I put a set on the same side as Dasher, back to back.  I stamped a greeting on this side.  Then I placed the next set of layers on the opposite side, carefully lining them up to match the first side.  I left this one blank so that I could write a short message.  
This is just a different type of card to make.  Some like it, some do not.  What do you think?  Leave me a comment and let me know.  

That's it for today.  I hope you all are off to a great week.  Come back tomorrow and thanks for stopping by today.


Friday, November 25, 2011

Pixie Dust

When my oldest daughter, Heather was about 2, she loved the movie Peter Pan.  We watched it so many times that she use to sit on the couch with me and recite the lines to the movie along with the characters.  That's right.  She memorized the entire movie!!  Of course she did the same thing with books.  Anyway, she loved the character Tinkerbell.  I think she liked the sass that Tink always had and thought it was funny when she would get into trouble. 

When I married my husband, I found out that his sister is also a huge Tinkerbell fan.  So I decided this year that I would try my hand at making a Tinkerbell.  After looking at various depictions I came up with an idea of how to make her using punches.  I know I am not the first to make her so if mine resembles anyone else's please let me know so I can give you credit.  Otherwise, yes I selected my punches and did this one myself.  Are you ready to see her? 


I started with a base card of Lucky Limeade.  I then added a piece of vellum card stock that I had picked up at a local scrapbook store.  It came with the "pixie dust" already on it.  If I am remembering right, it was in the section of the store where Disney papers and embellishments were, making it perfect.  I attached it by putting a little runner adhesive at the corners and then placed photo corners punched out using the retired photo corner punch over the top of the corners.  This hid any adhesive that might be showing through.  I stamped the greeting using the Curly Cute stamp set on Whisper White using Lucky Limeade ink, cut it down to the size I wanted, and rounded the corners using the corner rounder punch.  I added Dazzling Details (glitter glue) to the photo corners and to the greeting.  Now onto the star of the card.


Okay so her expression could have been a little better but let's face it (no pun intended) Tink has attitude!  I used the blossom builder punch for the wings and the bottom of her dress.  The heart to heart punch provided the top of her dress, her shoes, her ear and her arms.  The arms are the medium heart punched out then punch again offsetting the heart hole.  The shoes are the medium heart cut in half and trimmed.  The top of the dress is the large heart from it.  Her ear is the smallest heart.  For her legs, I used the word window punch and slimmed them down a little.  Her head is the small oval as is her neck.  I did trim the neck to fit better.  Her hair is a 1" circle while the bun and ribbon is the 1/2" circle.  The pom pom balls on her shoes are the medium circles from the owl builder punch.  I added green glitter to her ribbon and dress and yellow glitter to the pom pom's.  She is attached to the card using dimensionals.  

For my first attempt at Tinkerbell, I like how she turned out.  What do you think of her?  I hope you all have a wonderful weekend.  For those of you shopping, I wish you luck.  I personally stay home this weekend.  No Black Friday sales for me.  Saturday night will be lots of fun for my family as we build our traditional gingerbread houses.  I will be back on Monday with another share.  Hope you stop by.  Thanks for dropping in today.

Thursday, November 24, 2011

Happy Thanksgiving

Happy Thanksgiving everyone!!  I wish you all a wonderful day filled with family, friends, and good food.  Remember all you are thankful for today.  If you are like me, you will be watching the Macy's Thanksgiving Day Parade, football games, and cooking, cooking, cooking!!  Then comes the eating!!  I can hardly wait.  Today I am simply showing cards that were already posted but fit the day.


I wish you all a day filled with blessings.  Please come back tomorrow for a new card.  I am off to fix all the food!!  Thanks for stopping by today.


Wednesday, November 23, 2011

Busy, Busy, Busy

HAPPY BIRTHDAY to my sister in law Becky today.  I hope you have a wonderful birthday!! 

There always seems to be so much to do during the week of Thanksgiving.  There's cleaning and cooking and decorating - all important and all take time.  So it is hard to find time to sit and work on cards.  However, I had a huge task to do with my cards.  I believe I shared with you that I had submitted a Thank You card to my husband's charity committee for review.  As it turns out, they liked the card and asked me to make several for them.  As we are heading towards the holiday season, there will be lots of opportunities for them to say thank you.  So while cleaning and cooking and decorating I have also been working hard on these. 


This is one of my craft tables.  It is loaded with cards to finish.  I just need to add the ribbon and the logo and they are done!  Of course, this means I have to work extra hard today as I also have to empty the craft rooms of my tables so my dining room table can be moved into it and extended fully for tomorrow.  I am tired just thinking about it.  


Here is a closer shot of the card just in case you do not remember what it looks like.  I really enjoy making these.  The design is always so unique and they do not take any longer than a regular card.  Each one is designed basically the same.  The DSP is the only thing that changes.  I will add the logo to the empty step and the ribbon above the scallop circle.  I will be happy when these are finished.  
Well I am off and running again.  I will be sharing some of the Thanksgiving cards I made this year again tomorrow.  Be sure to stop by if you have time.  Thanks for dropping by today.

Tuesday, November 22, 2011

Who Does Whatever A Spider Can?

Spiderman of course!!!  Yesterday was our daughter's boyfriend's bitthday.  I am still getting to know him so when I asked my daughter what to make him for a card she said Spiderman.  Well, I am not really up to date on making him and turned to my handy internet for help.  I want to say a big thank you to Tami White for helping me with this.  I came across a video on a card that I thought looked pretty cool.  So I cased it for his card.  Are you ready to see it?


Now one of the main attractions to this card for me was the creative use of the the web impression folder.  But let's start at the beginning shall we.  I started with a base card of Pacific Point cut at 5 1/2" x 8 1/2", scored at 4 1/4".  Next I added a layer of Whisper White cut at 4" x 5 1/4".  After that came another layer this time in Basic Black.  It is cut at 3 3/4" x 5".  Now I was ready to take on making his face. 


As I said before, this is an extremely creative use of the web impression folder.  I started with a piece of Poppy Parade card stock cut at 3 1/2" x 4 3/4".  I chose the Poppy color instead of red because to me it looked more like the Spiderman color I remember.  I placed this piece in the web impression folder, centering the web as best as I could.  Then I ran it through the big shot.  Using my Basic Black classic ink pad, I brushed it over the top of the raised side of the impression making sure not to push down.  The idea is to highlight the web.  Of course, you inevitably get some on the other parts but it just adds character to the card.  I then adhered it to the black layer of the card using my runner adhesive.  The eyes were make using the ovals die for the big shot.  The smallest oval was cut in white, while the medium oval was cut in black.  I then trimmed the white ones into the shape I wanted.  Once I had it, I used it as a guide to cut the black ovals down to match.  Then adhere the white to the black and attach to the "face" of the card.  
A very simple card but I thought is was wonderful looking.  Thanks again Tami.  I am off to clean my house to get ready for Thursday.  Tomorrow is food prep day.  I can hardly wait to eat all that turkey!

Thanks for stopping by today.  See you tomorrow.

Monday, November 21, 2011

Frosty the Snowman

I absolutely cannot get enough of the Christmas carols during the holiday season.  Now I will admit I have been known to break into a holiday song at many times during the year.  For some reason, this music just brings a smile to my face and adds a pep in my step.  When I turned on the holiday channel on tv that plays the seasonal music today, I was happy to hear "Frosty the Snowman" playing and began singing along.  Of course, that led to my going through my Christmas stamps again  to see if I could create another card.  Imagine my excitement when I came across one of a snowman with a broom.  He just went along with the song and I had to stamp with it. 


He is just so happy to be out in the snow.  Now I don't know about you, but when I made snowmen as a child, they were cute, very cute in fact.  But they were not as cute as this one.  The base card for this is made with Cherry Cobbler card stock.  I then took a piece of Bashful Blue card stock and stamped it with a snowflake stamp from the retired set called Christmas Punch.  They were stamped using VersaMark ink and then heat embossed with white embossing powder.  I tore strips of Whisper White card stock to layer across the bottom of the blue section and highlighted the edges with dazzling diamond glitter.  I did dot the sky using dazzling details (a glitter glue) after I added the snowman onto the card.  Then my card was ready for the other items to be added. 


Here you can see Frosty close up.  I stamped him on Whisper White using StazOn ink.  I chose this ink so that I would be able to color him sooner that with the classic ink.  I chose colored pencils to color with on this one.  I must admit, I am a Crayola fanatic.  While the pencils I used on this card are not Crayola, I do have an extensive collection of their colored pencils and crayons.  Yes, I still like to color in coloring books with crayons.  It really relaxes me!!  I added some glitter to his scarf, hat, and nose to give him a little pizzazz.  He is attached to the card using dimensionals. 


The greeting on this one was easy for me.  When I looked at my finished snowman, I thought about the great joy it brought to me.  So the word "Joy" was a perfect fit.  It is made using Cherry Cobbler card stock.  Once the letters were cut out with my big shot, I glued them to the front of the card.  Adding dazzling diamond glitter to them was a no brainer for me.  Of course they had to be sparkly.   After all, the rest of the card is.

Well that's it for this Monday's post.  I want to wish my youngest daughter's boyfriend a very Happy 21st Birthday!!  Tomorrow I will share the card I made for him with you.  By the way, are you all ready for Thanksgiving?  I am almost ready myself.  Thanks for dropping by today and I will see you tomorrow.


Friday, November 18, 2011

Catch Me If You Can......

Now I do not know about your family but in my family, building gingerbread houses is a holiday tradition.  We set up a day for this event to take place just like pumpkin carving.  We do not bake our own gingerbread but buy the kits instead.  If you go into any store right now, you can find gingerbread kits pretty easily.  Some of them come with the house already built for you.  We do not buy prebuilt houses.  Half the fun it building it.  Anyway, my husband and I are going to be planning this event soon.  I can't wait!!


Today's card reminds me of the gingerbread man we always have outside out gingerbread house.  This was another one of those unmounted stamps I found in my binder.  Again, it called out to me to be used so I did.  Here is the result.


Here comes the gingerbread trio!!!!  I picked this stamp up years ago.  It's funny how you can forget what you have until you just happen to run across it.  Anyway, the base card for this one is in Real Red.  Layered on top of that is a piece of Garden Green.  I stamped a greeting from the stamp set Four The Holidays on Whisper White and layered it onto the green.  Once that was adhered, I ran the green through the big shot using the Snow Burst impression folder.  By doing this, it makes the white seem like it is part of the green card stock itself.  I then put the gingerbread people on top of the green with runner adhesive.  I decided to place a piece of grosgrain Real Red ribbon across the botton of the gingerbread people.  The entire green piece was then adhered to the base card using runner adhesive.  


Here's the trio close up.  I stamped them using StazOn ink and then colored them using my trusty colored pencils.  I did highlight the stripes on the candy letters using a fine tip black marker.  The may reason I did this was the "o" was not evenly divided so I needed to split one section in half.  I actually love the effect it gives to the letters.  The white part of the candy is filled in with dazzling diamond glitter.  I added some dazzling details glitter glue to the icing features on the gingerbread people as well as on the background as snow.  Once I was finished with these little people and everything had dried, I rounded the top corners of the paper and then edged it using Read Red ink.  
Tomorrow is my Christmas class and Crop.  If you have not signed up yet but want to come, let me know.  I know I will be having a wonderful time this weekend and I hope you have one too.  I will be back on Monday with another share for you.  Hope to see you then and thanks for coming by today!!
 

Thursday, November 17, 2011

Snow time

Here is sunny Phoenix, we do not usually see snow.  We can travel north to the Flagstaff area and play for a day but it is really rare to see snowflakes here.  I will say however that it has happened.  Many times especially as we get closer to Christmas, I wish I could be where the snow is.  I remember rolling up big snowballs when I was little and making a snowman with my brother and sister.  I do miss those times.  We seem to always have a bright sunny day for Christmas.

I pulled out a binder that I put unmounted stamps in to go through the other night.  I came across this little guy and just had to share him with you. 


Is he not one of the sweetest little snowmen you have ever seen?  Now he is not a Stampin' Up! stamp but I still think he is wonderful.  I love his presents and his festive hat.  Let's start at the beginning though with the base card.  The base is Pacific Point card stock.  I then took a piece of Bashful Blue to layer on top of it.  Before putting it on, I stamped snowflakes (another non-SU! stamp) all over it in VersaMark.  Using a white embossing powder with silver glitter in it, I heat embossed the snowflakes.  Once it was finished, I adhered it to the Pacific Point.  Taking a scrap of Whisper White, I tore several strips to place across the bottom of the card to form my layers of snow.  I added dazzling diamond glitter to the top edge of each layer.  My snowman was then attached using dimensionals.  

Here we can see him a littler closer.  I started him by stamping him with StazOn ink on Whisper White card stock.  I added color to him using colored pencils.  Once I finished coloring, I cut him out.  I added some Stickles glitter glue to highlight the snowman as well as the presents.  You can also see that I used the Dazzling Details glitter glue to add snowballs falling in the sky.  As I said before, he is attached to the card using dimensionals.


When I was ready to add a greeting to my card, I could not find what I wanted.  So I turned to my handy big shot machine.  I used the Decorative Strip called Billboard to cut letters out of Pacific Point card stock.  I decided to make the word "PEACE".  I found my letters in capitals, ran the strip through again to get a second "E", glued the letters to the card, and added some dazzling diamond glitter to highlight them.  
I have so much fun coming up with Christmas Cards.  I hope you enjoyed this one.  I will return tomorrow with another card.  See you then and thanks for popping in today!!

Wednesday, November 16, 2011

Another Use For Faces

My sister was over last weekend spending the day with me.  She works a lot so it is always nice when she had a day free to have lunch and goof around.  Even as adults we need to have fun.  We were sitting in my craft room looking at all the faces of the elves and Santa and Mrs. Claus and the Grinch.  I told her I had an idea of how to make a body for Mrs. Claus.  Well that idea turned into what I am about to share with you today.  I guess two brains are better than one. 


Ornaments!!!  They work great to make ornaments.  All you need is the head and a 2 1/2" circle punch.  I think they look wonderful.  Believe it or not, my mom had these satin green balls for out tree when I was little that had elf heads on them.  When I put that green guy together, all those memories came back.  They were some of my favorite decorations and I am thrilled to now be able to create a similar ornament to keep the memories going.  

As you can see, I did run each ball through the big shot using different embossing folders.  Some of them are from SU! while some are not.  For most of the ornaments, once the balls were embossed I glued the heads on, laid them aside to dry and then punched an 1/8" circle into the top.  I used silver elastic cord from SU! to string them with.  Now Mrs. Claus needed one extra step.  You see when you glue her head to the ball and then look at the back, she looks bald.  I could not have her missing hair especially since where I hung her you can see both sided of her.  So I punched a circle in Whisper White the same size as her face and glued it to the back of her head.  Then she had hair in the back.  I was much happier with her then.  


The Grinch's face comes down farther on the ball than the others.  This is just because his face is so long.  He still looks good.  I enjoy coming into my craft room and seeing these hanging off the garland over the half wall.  
Well, that is enough for today.  I am off to finish laundry and clean some.  I also need to decide what to share with you tomorrow.  Wonder what I will do?  Guess you will have to come back to find out if I manage to come up with anything tomorrow.  Thanks for dropping in today.  See you tomorrow.

Tuesday, November 15, 2011

You're A Mean One..........

I bet you can guess who I am going to show you today just by the blog title alone.  If guessed the Grinch, you would be right.  I really enjoy learning to make new characters and when I come across a wonderful, creative person who offers tutorials, I usually jump at the chance to learn from them.  I learned to make the Grinch from Bonnie Mountford.  I happened to come across her blog, saw a picture of the Grinch and bought her tutorial to learn how to make it myself.  Now since I purchased this and since she is the author, I am not allowed to include the instructions on how to make him.  I would encourage you to visit her blog.  She offers some tutorials for free while others are for sale at a reasonable price.  Anyway let's move on to my card for today.


This is of course the Grinch after he realized Christmas is not so bad.  While I cannot tell you how to make him, I will go over the rest of the card.  I started with Real Red cut at 5 1/2" x 8 1/2", scored at 4 1/4".  Cut a layer of Whisper White at 4" x 5 1/4 " and set aside.  Using Basic Black card stock, you will need to cut out a 3 1/2" circle.  I used my 3 1/2" circle die for the big shot to do this.  Once you have your circle, adhere it to the white card stock with runner adhesive.  Then place this in the Snow Burst impression folder and run it through the big shot.  For my greeting, I happened to find a stamp in my Christmas stamp drawer that I felt was perfect.  The writing looks whimsical to me and seemed to fit a Dr. Seuss character.  It is not from SU!.  I stamped it using Real Red ink on Whisper White, punched it out with a 1 3/8" circle punch, and sponged the edges with Real Red ink.  I then punched out a 1 3/4" scallop circle and ran it through the big shot with the Snow Burst impression folder.  Layer the white on this.  Place the Grinch on the black circles using dimensionals.  Then add your greeting using dimensionals.  

Here is a close up of the Grinch.  Even though I cannot tell you how to make him, I wanted to be sure you got a close look.  He looks so sweet here, just like Cindy Loo Who said.  When it came to the greeting inside, I was stumped.  I wanted something that would be really appropriate for him.  I really did not think I had anything to use.  I had just about given up when I came across the perfect stamp.

Isn't it perfect?!!  It comes from the stamp set called Tags til Christmas.  I stamped it with Real Red ink on white and punched it out with my scallop square.  It is also edged with Real Red ink.  
I hope you enjoyed this card.  Be sure to visit Bonnie's blog to find the tutorial.  She is very talented.  Tomorrow I will show you something else you can do with all the little faces.  Thanks for popping in today.  See you later.


Monday, November 14, 2011

Festive Elves

Last week I shared with you the stack of Christmas faces I had made using punches.  I used the Santa and his Mrs. on a card so you could see how just a face can be used to decorate.  Sometimes I think people feel the need to create an entire character, body and all, to use them on a card.  However, that is simply not true.  So today, I wanted to share my little elf faces with you.  So here we go.


I love these guys.  They are so cute!!  I don't know if you remember, but I did share a card a few weeks ago with an elf on the front.  The face of that elf is the same as this one.  It's just I left the body off.  I decided to make my elves using Real Red and Garden Green card stock for the hats.  I think you need a closer look at one of these little guys.

During the adding glitter portion of the card making, I always seem to get glitter on sections that I do not believe needs it.  You can see this time I ended up with a little glitter on the eyes.  Now I do not know about you but when I think of Santa's elves working on toys in their shop, I always picture them as being jolly and even sparkly.  For me, the glitter works no matter where it ends up.  One way you could change the look of this little elf is to emboss his hat using an impression folder and your big shot.  I chose not to this time but who knows about the future.  

I wanted to show you a close up of the background for this card.  I looked and looked for designer paper to use and could not find just what I wanted.  So I created my own.  I started with a piece of Whisper White card stock.  I took some scrap Real Red and Garden Green and punched out 1/2", 3/4", and 1" circles.  I then laid them out on the white until I found the pattern I was happy with.  I attached them to the white using my runner adhesive.  Once all circles were secure, I ran it through the big shot using the Snow Burst impression folder.  The neat thing about this technique is the card stocks all meld together.  It's just so neat.
Tomorrow I will share another card with a face only.  I am not telling who it is but I think you will like it.  So until then, thanks for stopping by and I will see you tomorrow.

Friday, November 11, 2011

The Happy Couple

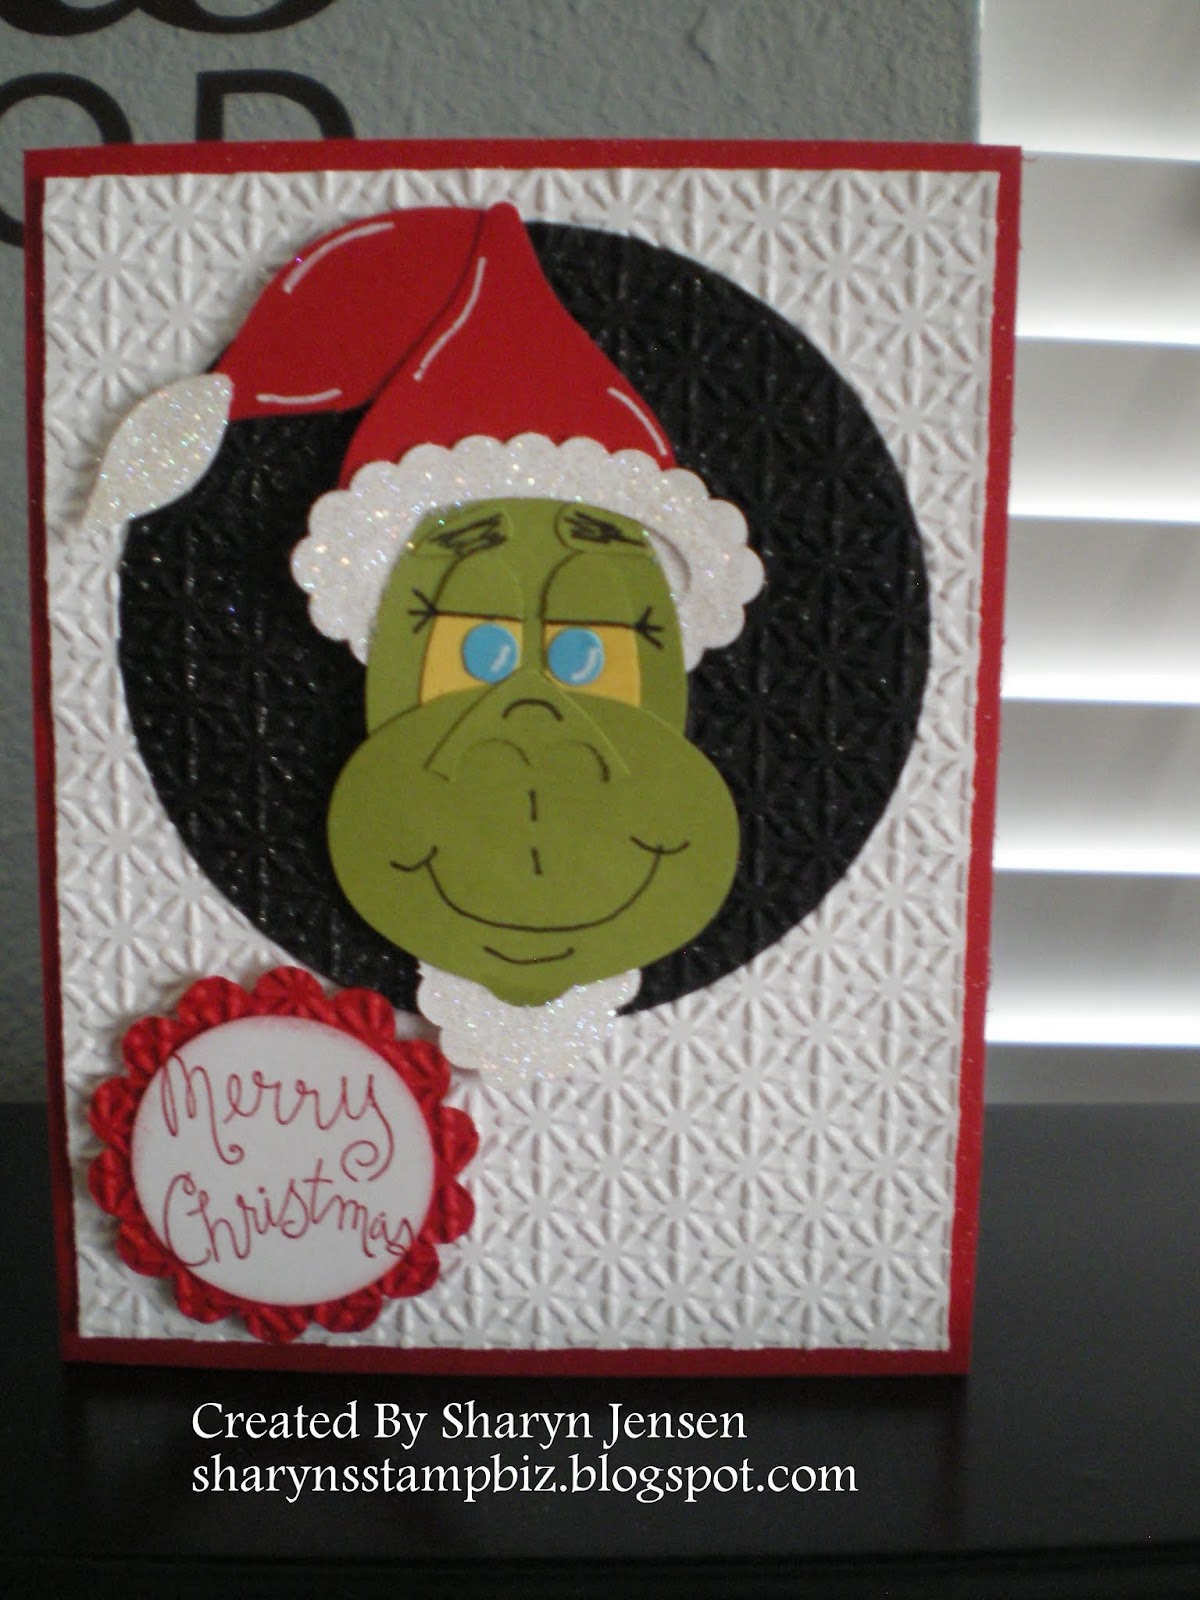
Have you ever had one of those days when you just feel like you can do nothing right?  Well, I am having one of those myself today.  Most of the time, it is all in my head and if I would look at things realistically I would see I am not a complete failure, a partial failure maybe, but not a total.  I sure hope I get rid of this blue feeling soon.  Oh well.  Let's move on.

I finally sat down and made a Mrs. Claus punch art face and then put a card together!!  Miracles do happen.  I avoided my stamp shelf until I needed a greeting for my card.  This is really a basic card mostly because I just cannot shake the blues and this was all I could come up with right now.  However, I must say it is cute.


The base card for this one is 4 1/4" x 11", scored at 5 1/2" in Whisper White.  I put a layer of Garden Green cut at 4" x 5 1/4" through the big shot using the Snow Burst impression folder.  The greeting is from the Teeny Tiny Wishes stamp set.  I stamped it in Real Red on Whisper White.  I punched it out using the word window.  I then punched a modern label out of Real Red and layered the white on top of it.  It is adhered to the card using dimensionals.  Now to the people!!

Here is the man of the hour himself, Santa.  Ever since I was a little girl, I have loved Santa.  Making him using punches was so much fun.  His hat is made with the wide oval punch.  The red part is embossed with the Snow Burst impression folder.  It is turned perpendicular to the  the white one.  The face is the large oval in Blushing Bride.  His mustache is made using the wings from the bird builder punch, while the beard is the ornament punch.  I ran the beard through the big shot with the Elegant Lines impression folder before attaching it to the face.  The eyes, nose and mouth are all from the 1/4" circle hand punch.  Layer your hat first and then add the face.  Place your beard next.  Using the top of the ornament as a guide, place an eye on each side.  Add the mustache with dimensionals and then put the nose on them where they meet.  Slip the mouth underneath and he is complete.  Add white gel pen to highlight the eyes.  Add dazzling diamond glitter to the brim of his hat if you like.  I added a pom pom ball to the hat to complete the look for me. 


Mrs. Claus is also pretty easy to make.  Her face is a 1 3/4" circle punch in Blushing Bride.  For her collar, I used the 1 3/4" scallop circle.  I did trim off some of the scallops to make the collar look right.  Her nose and black eyes are a 1/4" circle hand punch.  For the whites of her eyes, I used the medium circle from the owl builder punch.   For her hair, I punched out a 1 3/4" circle in Whisper White.  Cut it in half.  You will only need one half to do this.  On the flat side of the half circle, trim it to make her bangs.  Her bun is a 1 1/4" circle in Whisper White.  To make the ribbon for her, I punched another 1 1/4" circle in Real Red and then re-punched it to make it smaller.  It is layered on the white bun and then positioned behind the head.  I added red glitter to the ribbon, dazzling diamond glitter to the collar, white gel pen to the eyes, and drew on a mouth with a fine tip black pen.  I think she is beautiful!  I will confess that when I made another one of her I did add a couple of things.  I added ears using the medium circle of the owl builder punch and I put little rhinestone earrings on her ears.  I will try to get another card made with the new version of her for you to see. 

Once again, we are at the end of the week.  I will be prepping more punch art and cards for my upcoming class on the 19th.  If you are interested in coming, email me.  Cost is $10.  Class is from 10 am to noon, followed by an afternoon crop from noon to 4 pm.  

I wish you all a wonderful weekend.   To all the veterans out there, thank you for your service.  I will be back on Monday.  Thanks for stopping by today. 

Thursday, November 10, 2011

Dasher Rides Again!!

Yesterday, I shared with you all the little punch art characters I have been making to use on Christmas cards.  I set out to try Mrs. Claus and do some reindeer heads to add to the collection.  My plan was to make those and then make a card using some of the characters.  However, on my way to my punches, I passed by my stamp shelf and noticed my stamp called Dasher.  I remember when SU! started including single stamps for sale, this was one in the first group.  I fell in love with this stamp and could not wait to order it.  So seeing it on the shelf, I felt this pull to use it once again.  Of course, I did which meant the other project flew out the window (and it wasn't even open!).  Let me share Dasher with you now and you too will be enchanted by him.


Here is the card I came up with for him to adorn.  I started by cutting out a top note in Night of Navy card stock using my big shot and the top note die.  I then stamped Dasher onto this, more to the right side, using VersaMark ink so I could heat emboss him with silver embossing powder.  The ribbon across the bottom is a non-Stampin' Up! item.  The craft stores always seem to get the cutest ribbon at the holidays.  I just could not resist.  Using my paper trimmer for a guide, I scored the top not about an 1" in from the left side.  I then attached the ribbon across the bottom of it so the words would show.  Using Whisper White card stock, I cut a piece to be 4" x 5 1/4" and ran it through the big shot using the impression folder called Snow Burst (it's in the holiday mini).  I folded the left side of the top note where I scored it and attached the folded flap to the back of the white.  Then adhere the rest to the front.  Now I did this before stamping the snow flakes so I could be sure of exactly where I wanted to stamp them.  The stamp I used is not from SU!.  It is one I got years ago.  I stamped them with VersaMark ink and heat embossed them using white embossing powder.  The white card stock was then adhere to a Bashful Blue card.  


The greeting comes from the stamp set Perfect Punches.  It is stamped onto a piece of Whisper White card stock using VersaMark ink and heat embossed using silver embossing powder.  Once cooled, which only takes about 10 seconds, I punched it out using the 1 3/4" scallop circle punch.  I attached it to the rest of the card using dimensionals.  You could choose to edge the circle with Night of Navy ink to help it stand out but I chose not to this time.  
Well now you know what I did instead of the project I said I would do.  I am going to give it my best shot not the become distracted again and actually do my punch art card.  I guess I better stay away from my stamps.  Tune in tomorrow to see how I do!!  Until then, thanks for dropping by today!!

Wednesday, November 9, 2011

Preparing For The Holidays

Yesterday I decided to start preparing for the holidays by practicing my dressing recipe.  I tweeked it just a little and made it homemade instead of buying the bread or prepared boxes.  I must say it turned out pretty well and even my daughter, one of my hardest critics, liked it.  It also really got me in the mood for turkey and all the trimmings having to smell it baking.  I also had to take all the Halloween decorations down to get ready to put my harvest ones up.  Needless to say, I did not have much time for crafting.  So no card to share for today.  However, I will share a couple of other items with you.

Last weekend my husband and I hosted a potluck dinner for his CERT group.  CERT stands for Community Emergency Response Team.  They are trained to help in times of disaster.  My husband and his partner, Paul, do all the training of them.  Anyway, one of the members brought along a treat for everyone.  I wanted to share it with you in case you are looking for something easy to make for a party or gift.


These are chocolate covered pretzel sticks.  We make these at my house every year.  These were made by Pat Turner.  She took the pretzels once they were solid and placed them in individual cellophane bags.  Cellophane bags like these are currently available in the holiday mini.  You get a package of 50 for $2.50.  Once they were in the bag, she chose a couple of colors of ribbon that were harvest looking and used an embellishment on each one.  Now for me, I do these for Christmas so I would more than likely use Real Red and Garden Green ribbon and make little owl Santas to embellish with on the package.  Easy to make and so cute to give to others.  (By the way, they tasted good too!!)


Here is a the other project I worked on yesterday.  I made a bunch of punch art Santas, elves, and poinsettias to use on Christmas cards.  I will be doing a class later this month and these are what we will be making.  I hope to do a couple of more designs like a reindeer head and Mrs. Santa Clause too.  I hope to have time in the next couple of days to work on those.  Anyway I have not just been sitting around eating those pretzels.  These little guys are so much fun to make!
Hopefully I will have a new card to share tomorrow.  My husband has a meeting tonight so maybe I will get time to craft.  Thanks for stopping by today and I will see you tomorrow.

Tuesday, November 8, 2011

Santa's Ride

I decided today to go back to my favorite paper folding technique -- Iris Fold.  I have so many patterns for this technique that I really do need to spend a day going through them and trying all of them out.  I happened to come across a set of Christmas ones and thought it was the perfect time to work on those.  So here is the one I chose today:


This particular pattern called for 3 coordinating papers.  So I went to my scrap box and took out 3 of a retired DSP from Stampin' Up!.  The color is Always Artichoke.  I like this dark green color and chose it for the base card.  The greeting is stamped in matching ink and comes from the current stamp set call Four the Holidays.  As you can see clearly, my hand rocked slightly when I was stamping it and it looks a little shaky at the end.  


I tried to get a little closer to the sleigh but did not want to cut much of it out.  The runner of the sleigh is made from Brushed Silver card stock.  It is adhered to the front of the card under the cut out part for the sleigh.  Let me refresh you on the Iris fold technique.  You begin with a pattern of what you are going to make.  Lay the pattern on a light box and put your piece of card stock on top of it.  Trace the pattern onto the card stock.  Then place your traced image on a cutting mat and cut the image out using a craft knife.  Lay the card stock with the cut out image on top of the pattern again and follow the pattern to get your layered look.  I find my patterns on the internet mostly.  You can google iris fold patterns and it will come up with sites for you to visit to check out the patterns.  It is really an easy technique.  
I am off to work on my Christmas cards again plus a few other items.  I got a little behind.  I suffer from depression and migraines and believe me when either of those flair up I get behind on everything.  Oh well.  Thanks for stopping by today.  See you tomorrow.

Monday, November 7, 2011

The Surprise Card

Happy Monday everyone and a great BIG HAPPY BIRTHDAY to my niece, Pamela.  I hope your day is absolutely fantastic.  I send you happy wishes and lots of love!!  Hug those kids of yours for me.

I hope you all had a wonderful weekend.  I only had a few things to do so I was able to slow down and enjoy the weekend.  Now you may be wondering why I chose the title "The Surprise Card" for this blog.  Well it will become apparent once you see the card.  This was my father-in-law's birthday card.  I want to start by thanking Ellen Kemper once again for being the punch queen.  I learned the punch art featured in the card at her blog.  I encourage you to visit it sometime.  Now on to the card!!


For the front, I used my Cricut to cut out the Happy Birthday and the shadow for it.  I layered them and then added some glitter glue to enhance the look.  The party hat and the party favor are dies I have for my big shot.  I bought them years ago at a local craft store.  I added glitter glue to them too for decoration.  I wanted to make the front of the card a pretty generic birthday card so that when he opened it he would be surprised.  So here we go inside the card!!  


Ta Da!!!  Were you surprised the find the 7 dwarfs looking at you?  They are the punch art I learned from Ellen Kemper.  The letters for the "From All Of Us!" were cut out with my Cricut.  I felt no need to put anything else further inside especially since the dwarfs take up a lot of space.  Let me explain how I chose these little guys for this card.  My in-laws live in California not too far from the Magic Kingdom.  They are big Disney fans.  For years,  they have gone to Disneyland  one or more times.  I do envy them that.  By husband's youngest sister even worked at the part as Pinocchio when she was younger!!  Any way, I wanted to do something Disney for him and happened to remember these guys.  Let's look a little closer at them.


On the bottom flap of the inside, we find Dopey and Doc.  I think the hardest part of these two was Doc's glasses.  I really had to be mindful of the placement so they would look right.  Dopey was the easiest of the characters to make.  

Here is the rest of the gang:  Sleepy, Bashful, Sneezy, Grumpy and Happy.  Notice Sneezy has a very red nose to distinguish him.  Grumpy has those great eyebrows and Sleepy's eyes are closed.  For Bashful, we find him looking upward with those bashful eyes.  The eyelashes are his distinguishing feature.  Then there is happy.  He too is looking up.  Though it is hidden by his nose in the picture, he also has the biggest smile of them all.  

I do not know if I can top this card this week.  I really like this one and hope you like it too.  I will be back tomorrow though.  I hope you come back too.  Thanks for stopping by today.


Friday, November 4, 2011

Biten By the Love Bug

Welcome to Friday!!  Yes we have once again reach the end of a week.  I want to send out a big HAPPY BIRTHDAY to my father-in-law, Bob.  I hope he has a wonderful day.  We sure wish we could be with you!

I would usually share the card I made for someone on their birthday.  However, just in case it did not reach him by today, you will have to wait until Monday to see it.  As I told you yesterday, I did spend the day looking through my older stamp set which have retired and sure enough I came across one that I wanted to play with.  The color scheme for today are all available colors from Stampin' Up!.  So lets get started on the card.


The base card is done in Rich Razzleberry.  Layered on top of that is a piece of Basic Black card stock.  I started the actual card front by taking a piece of Whisper White and punched all the corners using the Scallop Trim corner punch.  I then added some doodle dots (I love saying that) to the loops using a fine tip black marker.  Then I punched out a modern label in Basic Black.  I got down my handy Teeny Tiny Wishes stamp set, which by the way is still available in the SU! catalog, and stamped "thank you" on a scrap of Whisper White.  It was punched out using the word window punch and layered on top of the modern label.  I decided where I wanted it placed on the white and used my runner adhesive to attach it. 


Then I used one of the cutest hostess sets I have ever seen.  It is retired but I still like it too much to just let it sit on the shelf.  The set is called Love Bug.  This little guy is probably my favorite stamp in it.  Don't get me wrong.  The others are cute too.  I stamped this little guy using Staz-On black ink so that I would be able to color him immediately.  I colored his little shoes with a Basic Black Su! marker as well as his antennas.  I then used my Rich Razzleberry marker to color in his body.  

I added the Dazzling Diamond glitter with a two way glue pen that I zigzagged on the card.  This card is so simple and could be used for all occasions and made in any color you like.  This is another one that I left blank inside so I could write my note.  

I wish you all a very pleasant weekend and hope you will come back on Monday to see my birthday card for my father-in-law.  Thanks so much for dropping in today and have a wonderful weekend.  See you Monday!

Thursday, November 3, 2011

It's A Big Shot Day

Every now and then, I go to my craft room, pull out my scrap box and sit down at my big shot.  I tend to forget everything I have for it since it is not used on every card.  Taking time to sit for a while and use the dies and impression folders allows me the opportunity to go through what I have.  Some days, I just cut out things and other days I actually make a card with some of the items I cut out.  Today's share is one of the cards I made with the pieces I cut.

Now before I share this one, I want to be sure you know it is a very simple card.  I put this one together to use as a note card to send to a friend.  Since it is not for a specific occasion, I did not use any stamps on this one at all.  So here we go.


Simplicity at its best.  Now I do believe these colors are retired, all except the Whisper White.  I am pretty sure the other 2 colors are Green Galore and Pink Passion.  This card could be done in any color you would like.  Of course, I would stick with a green for the leaves.  Although if you are a Dr. Seuss fan, you might want them some other color.  I started with a piece of Whisper White and ran it through the big shot using the impression folder called Finial Press.  This is one of the most elegant looking folders I have and believe me I have quite a few.  I layered it on top of the pink base card and I was ready to look for something to decorate the front.

To make these beautiful flowers and leaves requires 3 components only:  the Sizzlit called Little Leaves,  the Sizzix Embosslit folder called Simple Flower, and 2 couple of gold brads.  The gold brads and the Little Leaves die are still available in the current Stampin' Up! catalog.  The Simple Flower is retired but believe me there are other dies in the catalog that you could use.  The nice thing about embosslit dies is the not only cut out the shape for you, they also emboss it giving it a texture as seen on the flowers on this card.  To distinguish the center of the flower, I used brads.  Again there are other items you could use such as eyelets or rhinestones.  In contrast, the sizzlit die only cuts out the leaves for you.  There is an embosslit in the catalog called Sweetest Stem that would cut out leaves and emboss them too.  I used my TomBo multipurpose glue to adhere the leaves to the card.  Then I attached the flowers using dimensionals.  Very simple to put together.  You could add other embellishments such as glitter if you want to decorate the card more.  The inside is left blank so I can write my note.
I did say today's share is a very simple card.  For tomorrow, I will have a card which uses a retired stamp set.  Again, I am planning to spend a day going through my older sets to see what I have.  I just know I will come across something I will just have to use.  Until tomorrow, keep stamping and thanks for stopping by today!!

Wednesday, November 2, 2011

Charity Begins At Home

One of the most important traits we want our children to have is the knowledge that it is better to give than to receive.  We always want them to remember that there are so many others who do not have one thousandth of what our girls do.  Growing up in the age of reality tv, I really think that we have an overwhelming responsibility to teach our children to be giving.  They are seeing so much selfishness on those reality shows!  Well I am truly one lucky lady.  My husband is one very involved person in the community.  He serves on the charity board of his fire department and runs all kinds of charity events throughout the year.  I love to help him and really love when our girls come to help too.  As we are in the season to remember and be thankful for our blessings I hope everyone takes time to give of themselves to help others.

So what does all of this have to do with making cards?  Well, one item I worked on over the last day or so is a thank you card for my husbands charity committee to use.  He asked me to design one so he could share it at their meeting today.  I am hoping they like it and will want more.  Anyway, I thought I would share it with you today too.


I chose to do a side step card mainly to be different than anything else they may have seen.  I used Real Red for the base card and went from there.  I used one of my all time favorite DSP's with the little cherries on it.  It is so old I cannot even remember the name but I love it.  The "thanks so much" stamp on the 1 3/8" circle is from the retired set called Eight Great Greetings and is stamped using Old Olive ink.  I layered it on the 1 3/4" scallop circle in Real Red.  This side is finished off using a piece of Old Olive ribbon tied in a knot.  The " Thank You" on the bottom is from the stamp set Curly Cute which is available in the catalog.  The logo of the charities is printed out on card stock and punched out using the designer label.  Then I created a border for it using Old Olive.  Let's look at the last piece of this card.


The "You Always Do The Nicest Things" is from the retired stamp set called Happy Greetings.  It is stamped in Real Red.  Now the cute little fire fighter stamp is from a different company.  I know SU! use to have a set of stamps all themed with fire fighter images.  When it retired, they did not make a new one.  I really wish they would.  I have been unable to locate one of the old ones to buy.  Anyway, he is stamped in Basic Black.  Now I thought about coloring him but decided against it.  I did not want to take away from any of the details on him.  This layer of Whisper White is attached to a piece of Old Olive and then adhered to the card.  When making a card like this, you just need to remember to only apply adhesive to the area that will actually be attached, not all the way from top to bottom.  Otherwise you will have one sticky mess.
Well, I will let you know how the board liked the card.  I will be making these to donate to them and am really looking forward to it.  Thanks for stopping by today and be sure to drop in tomorrow!!