Handmade gifts usually mean a lot to people because of the time, love and care you put into them. So this year, our oldest daughter Heather asked me if I would make her a recipe box for her birthday. She has really taken to cooking this past year trying new recipes and seems to enjoy it. She needed a place to store all those yummy recipes and it just seemed like the right time to make one for her. Since we did her birthday dinner this past Saturday, which by the way it was a build your own pizza party and was a huge hit, I gave the box to her. I thought I would share it with all of you today.
This is a view of the top of her box. Heather is a big Pirates of the Caribbean fan so we chose a box shaped like a treasure chest for her. This started as a plain wood box I bought at a local craft store. I painted the entire box a medium blue and the edges a dark blue. I knew I would be covering the box with paper but just in case any little areas showed through I wanted there to be a color and not plain wood.
Once the entire box was painted and dry, I took out some blue gingham paper I picked up a few months ago and a ruler and began measuring the dimensions needed for each side. Once I had a piece cut, I would add a little repositional adhesive to the paper and put it on the box to verify I had the right shape and measurements needed for the piece. When all the pieces were cut out and were correctly measured and shaped, it was time to start attaching it to the box. I did this using a technique called decoupage. I used an adhesive called Mod Podge. This is a liquid white glue. I used a sponge applicator to apply the adhesive to the entire back side of each piece of paper. Do one piece at a time. Once the adhesive is on the paper, carefully place it on the box and smooth it down. You will do this for all the pieces of paper and will need to let the box dry. Then it is time to decorate your box.
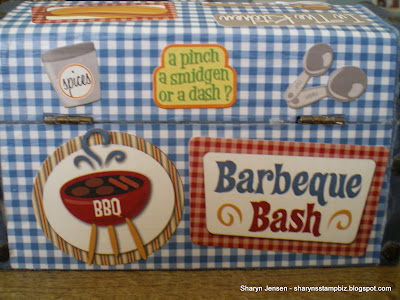
I made the name plate using Whisper White and Night of Navy card stock. I added sticker letters to this for the words. For the rest of the add on, I chose some really cute sticker sets I found at the craft store. I could have made the decorations but these were so cute I decided to use them. Let's take a look at the other sides of the box.
Here is a look from the front.
This is the back side.
Here is one of the sides.
And here is the other side.
I carefully chose the stickers I wanted to use and applied them directly to the box. For the ones that came with a dimensional on the back, I peeled the dimensional off and add Mod Podge to it so the entire piece would stick. Once all the stickers were added and I was happy with the look, I used the sponge applicator once again to add another coat of Mod Podge over the paper and stickers to seal these down.
What good would a recipe box be without some way to organize it. So I made divider cards to go in the box. I used various colors of card stock and made tabs using the retired label punch. These are glued to the card stock. I then used my label maker to add the headings to the tabs. I know it is hard to see but I did add some food stamps to the dividers using VersaMark ink to make the designs.
Finally I made about 150 recipe cards for her to use. I happen to find this stamp a few years ago, where I cannot remember. I stamped the cards with black ink and then added a little chef person (kind of reminds me of one of the Campbell's Soup kids) to the corner with red ink. I bundled these together with a red ribbon and place them along with the dividers inside the box.
I must tell you I think she loved it!! I know it is something she can use for years to come and I hope it will always remind her of me and how much I love her. Thanks for stopping by today and I will see you tomorrow.


No comments:
Post a Comment